4. Sales Lead
The Sales Lead screen enables you to record information gathered during a sales query or a call from a potential borrower. A sales representative can then use the Sales Lead screen to follow-up with the borrower. This is not a mandatory screen. You can always begin the Line of credit origination process directly using the Application Entry screen.
Information on the Sales Lead screen can be attached to the Application Entry screen as optional information. Attaching a lead to an application can help the sales department analyse the effectiveness of following-up with prospective borrowers. Once a lead is attached to an application from the Sales Lead screen, Oracle Financial Services Lending and Leasing changes its status to COMPLETED.
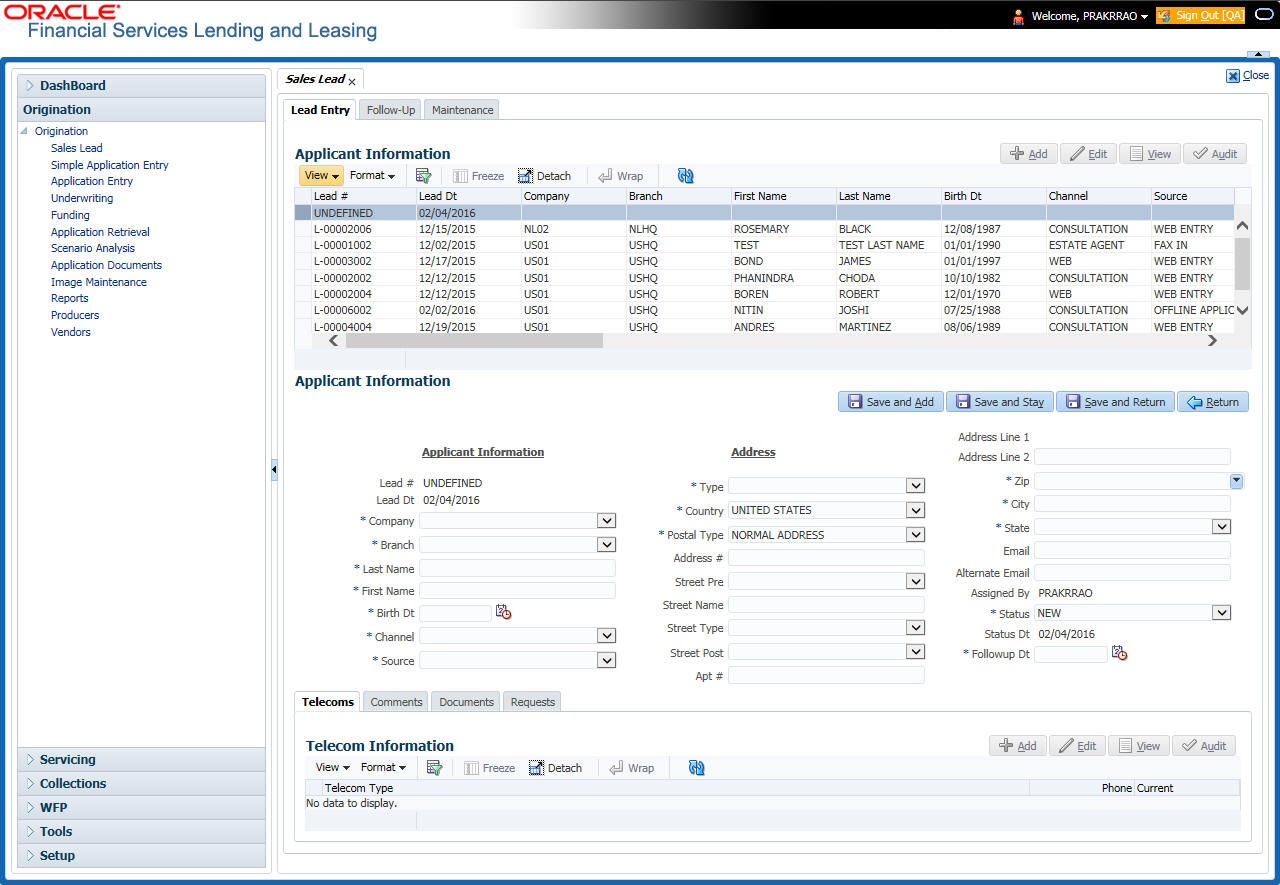
4.1 Lead Entry screen
The Lead Entry screen enables you to record information regarding prospective borrowers from a sales query or a call to be used in a follow-up call. The initial status for the lead can be set as NEW or FOLLOW-UP.
To complete the Lead Entry screen
- On the Oracle Financial Services Lending and Leasing home screen, click Origination underSales Lead.
- On the Sales Lead screen, click the Lead Entry.
- If you are entering a new applicant, click Add in the Applicant Information section.
-or-
If you want to edit an existing applicant, select it in the Applicant Information section.
If you click Previous, Oracle Financial Services Lending and Leasing displays information for the previous applicant. If you click Next, the system displays information for the next applicant.
- In the Applicant Information section, enter, view or edit the following information:
In this field:
Do this:
Lead #
View the sales lead number (display only).
Lead Date
View the sales lead date. System defaults the current date (display only).
Company
Select the company name (required).
Branch
Select the branch name (required).
First Name
Enter the applicant’s first name (required).
Birth Dt
Specify the date of birth. (required).
Last Name
Enter the applicant’s last name (required).
Channel
Select the channel of the sales lead (required).
Source
Select the source of the sales lead (required).
- In the Address section, enter, view or edit the following information:
- For creating a new record, click Add.
In this field:
Do this:
Type
Select the address type (required).
Postal Type
Select the postal address type (required).
Apt#
Enter the building number (optional) .
Pre
Select the street prefix (directional) (optional).
Street Name
Enter the street name (optional).
Street Type
Select the street type (optional).
Post
Select the street postfix (directional) (optional).
Apt #
Enter the apartment number (optional).
Address 1
Enter the first address line (optional).
Address 2
Enter the second address line (optional).
City
Enter the city (required).
St
Select the state (required).
Zip
Select the zip code (required).
Note: For non US country, you have to enter zip code.
Country
Select the country code (required).
Email
Enter the e-mail address (optional).
Alternate Email
Enter the Alternate e-mail address (optional).
Status
Select the status for the sales lead (required).
Assigned By
View the user code creating the sale lead (display only).
Status Dt
View the last sales lead status change date (display only).
Follow-up Dt
Enter the sales lead follow-up date (required).
- If you enter a new record in the Address section, click Save.
4.1.1 Telecoms sub tab
The Telecoms sub screen records additional phone numbers for the sales lead.
To complete the Telecoms sub tab
- On the Oracle Financial Services Lending and Leasing home screen, click the Sales Lead master tab.
- On the Sales Lead screen, click the Lead Entry tab, then click the Telecoms sub tab.
- On the Telecoms sub tab, enter, view or edit the following information:
- To create a new record, click Add.
In this field:
Do this:
Telecoms section
Telecom Type
Select the type of telecommunications device (required)
Phone
Enter the phone number (required)
Current
Select the Current check box to indicate the phone number is in service.
- If you enter a new record in the Telecoms sub tab, click Save.
4.1.2 Comments sub tab
The Comments sub tab records any comments regarding the sales lead.
To complete the Comments sub tab
- On the Oracle Financial Services Lending and Leasing home screen, click Sales Lead.
- On the Sales Lead screen, click the Lead Entry tab, then click the Comments sub tab.
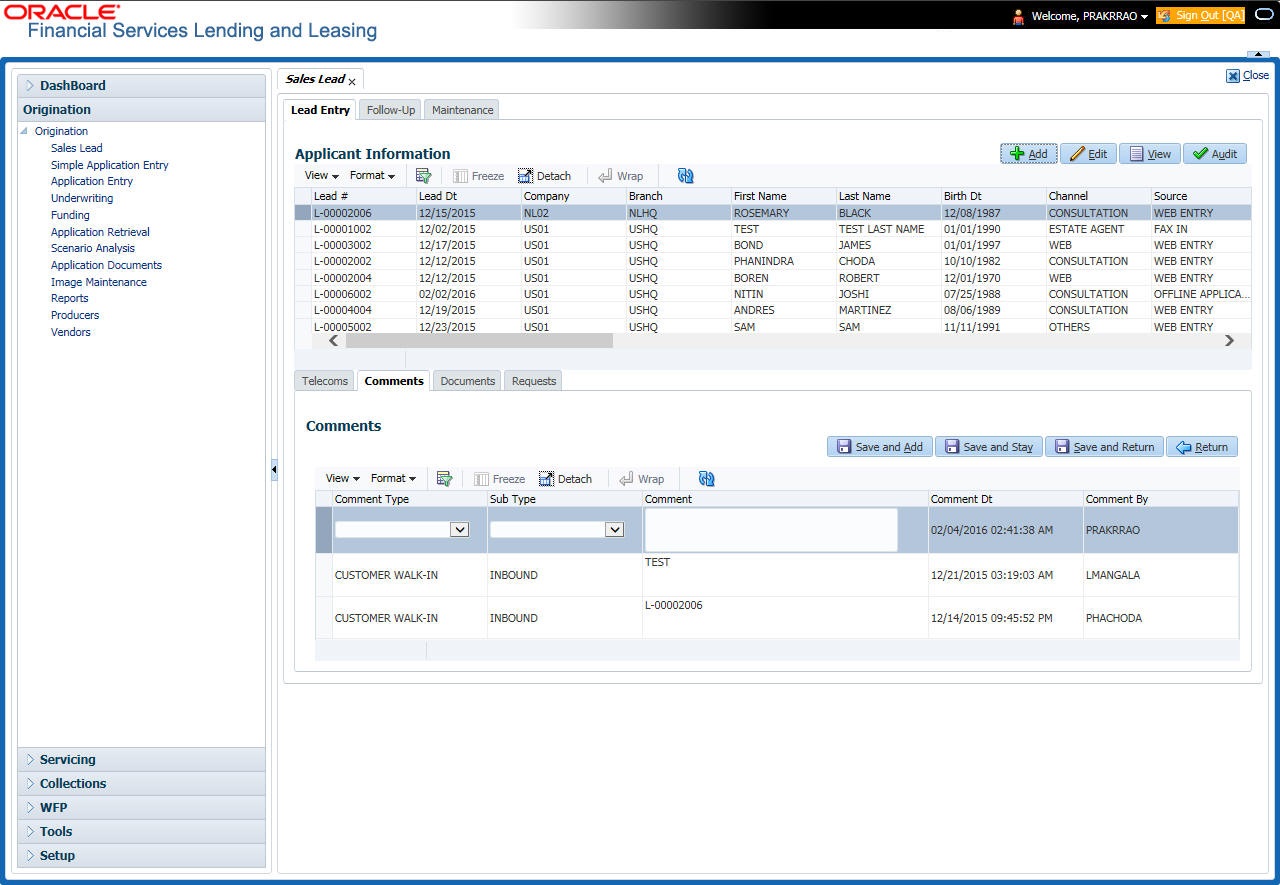
- On the Comments sub tab, enter, view or edit the following information:
- If you are creating a new record, click Add.
In this field:
Do this:
Comments section
Comment Type
Select the comment type (required).
Sub Type
Select the comment sub type (required).
Comment
Enter the comment (required).
Comment Dt
View the date the comment was entered and saved (display only).
Comment By
View the user id of the person who entered and saved the comment (display only).
- If you enter a new record in the Comments sub tab, click Save.
4.1.3 Documents sub tab
The Documents sub tab needs to be completed if:
- The customer had requested any documents.
- Any document has been sent to the customer during sales lead entry.
To complete the Documents sub tab
- On the Oracle Financial Services Lending and Leasing home screen, click the Sales Lead master tab.
- On the Sales Lead screen, click the Lead Entry tab, then click the Documents sub tab.
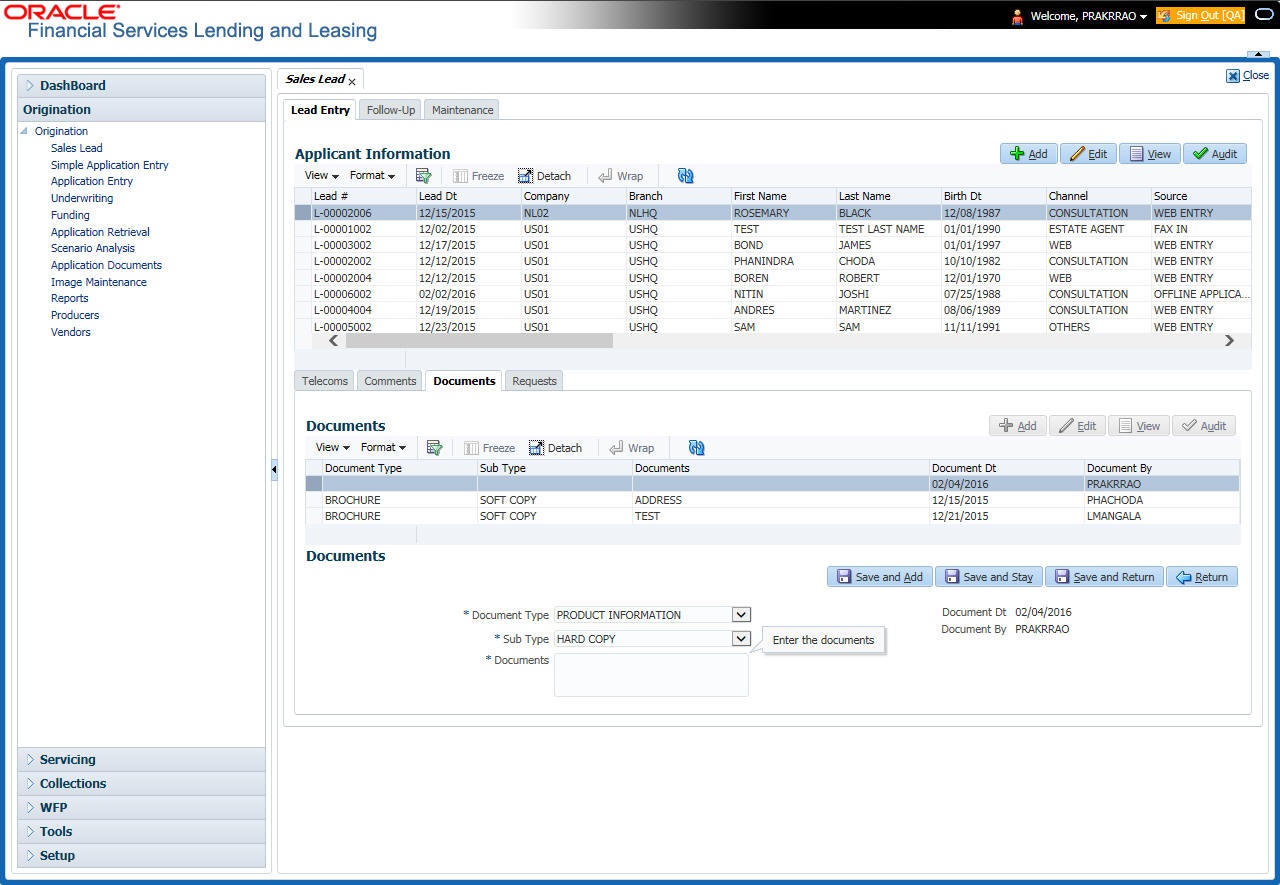
- On the Documents sub tab, enter, view or edit the following information:
- If you are creating a new record, click Add.
In this field:
Do this:
Documents section
Document Type
Select the document type (required).
Sub Type
Select the document sub type (required).
Documents
Enter the document (required).
Document Dt
View the date the document was entered and saved (display only).
Document By
View the user id of the person who entered and saved the document (display only).
- If you enter a new record in the Documents section, click Save.
4.1.4 Requests sub tab
The Requests sub tab records the product the customer is interested in and the requested amount for each product.
To complete the Requests sub screen
- On the Oracle Financial Services Lending and Leasing home screen, click the Sales Lead master tab.
- On the Sales Lead screen, click the Lead Entry tab, then click the Requests sub tab.
- On the Requests sub screen, enter, view or edit the following information:
- If you are creating a new record, click Add.
In this field:
Do this:
Requests section
Product
Enter the requested product as Line of credit (required).
Requested Amount
Enter the requested amount (required).
- If you entered a new record in the Requests section, click Save.
4.2 Follow-Up screen
The Follow-Up screen enables you to update customer information based on sales lead follow-ups with the customer.
To use the Follow-Up screen
- On the Oracle Financial Services Lending and Leasing home screen, click the Sales Lead master tab.
- On the Sales Lead screen, click the Follow-Up tab.
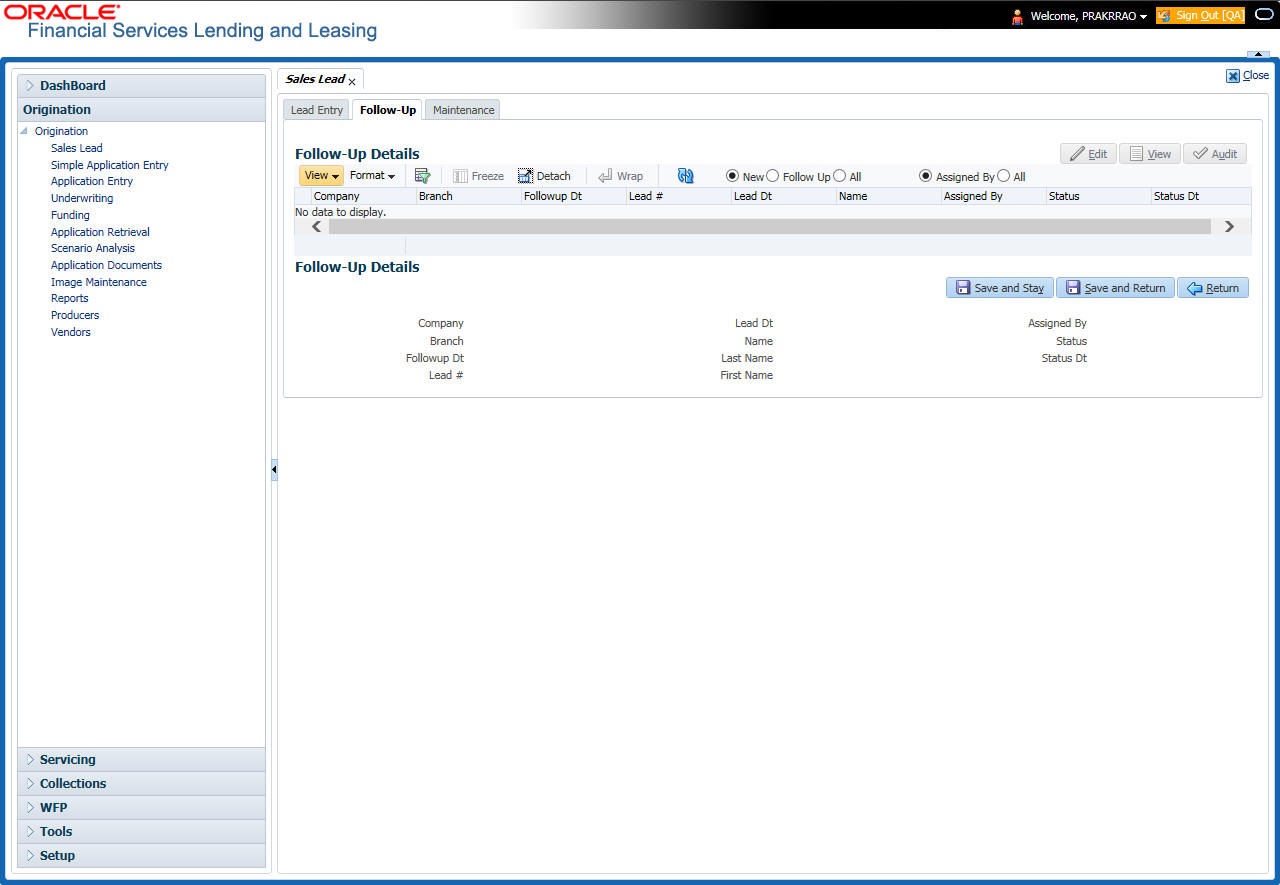
- In the Status section, click:
- New to view all leads on the Follow-Up screen with the status of NEW.
-or-
- Follow Up to view all leads on the Follow-Up screen with the status of FOLLOW UP.
-or-
- All to view all leads on the Follow-Up screen.
- In the Assigned section, click:
- Assigned By to view all leads on the Follow-Up screen assigned to the current user.
-or-
- All to view all leads on the Follow-Up screen assigned to any user.
- On the Follow-Up screen, enter, view or edit the following information:
In this field:
Do this:
Company
View the company name of the sales lead (display only).
Branch
View the branch name of the sales lead (display only).
Followup Dt
Select the follow-up date of the sales lead (required).
Lead #
View the sales lead number (display only).
Lead Date
View the creation date of the sales lead (display only).
Name
View the applicant’s name (display only).
Last Name
View the applicant’s last name.
First Name
View the applicant’s first name.
Assigned by
View the user assigned to the sales lead (display only).
Status
Select the status of the sales lead (required).
Status Dt
View the last sales lead status change date (display only).
- Click Save on the Follow-Up screen.
4.3 Maintenance screen
The Maintenance screen enables you to attach a sales lead to a different or missed application or change status of lead as New.
To attach a sales lead to an application
- On the Oracle Financial Services Lending and Leasing home screen, click the Sales Lead master tab.
- On the Sales Lead screen, click the Maintenance tab.
- In the Lead Details section, view the following display only information:
In this field:
Do this:
Select
If selected, indicates this is the current record.
Lead #
View the sales lead number.
Last Name
View the last name of the sales lead.
First Name
View the first name of the sales lead.
Status
View the status of the sales lead.
Company
View the company of the sales lead.
Branch
View the branch of the sales lead.
Days of Inactivity
View the number of days of inactivity regarding the sales lead.
- In the Lead Details section, select the sales lead you want to attach to the application.
- In the Action section, click Attach to an Application.
- In the Action section, select the application number to which you want to attach the sales lead in the unlabelled App # field.
- In the Action section, click Post.
- In the Application section, view the following display only information:
In this field:
View this:
Select
If selected, indicates this is the current record.
Priority
The priority of the sales lead.
Application #
The application number of the sales lead.
Date
The date of the application.
Title
The title of the application.
Product
The product of the application.
Status
The status of the application.
Producer
The producer of the application.
Note
If a wrong sales lead is attached to an application, detach it from the existing application by clicking Change to New Status in the Action section. You can then attach it to the correct application clicking Attach to an Application, completing the App # field and clicking Post.